


When it comes to carrying a firearm inside the waistband (IWB), comfort and accessibility are critical. The position of your holster can make all the difference in your daily routine. Here’s a quick overview of the six most comfortable IWB holster positions and who they work best for:
- Appendix (1 O'Clock): Quick access, ideal for athletic builds and active lifestyles.
- Hip (3-4 O'Clock): Great for everyday carry with natural arm alignment.
- Mid-Back (4-5 O'Clock): Works well with business attire and offers good concealment.
- Side-Back (5 O'Clock): Suited for larger body types, but may be less comfortable when sitting.
- Cross Draw (10-11 O'Clock): Perfect for seated jobs like driving, with easy access while sitting.
- Center Back (6 O'Clock): Provides maximum concealment but comes with safety and accessibility challenges.
Each position has its pros and cons depending on your body type, daily activities, and wardrobe. Adjustments like ride height, cant angle, and belt position can improve both comfort and concealment.
Quick Comparison Table
| Position | Location | Best For | Key Considerations |
|---|---|---|---|
| Appendix | 1 O'Clock | Athletic builds, active use | Quick draw, but may press into waist |
| Hip | 3-4 O'Clock | Everyday carry | Natural arm alignment, good concealment |
| Mid-Back | 4-5 O'Clock | Business attire | Comfortable, but may print when bending |
| Side-Back | 5 O'Clock | Larger body types | Concealed well, but less comfy seated |
| Cross Draw | 10-11 O'Clock | Drivers, seated jobs | Easy seated draw, needs practice |
| Center Back | 6 O'Clock | Maximum concealment | Safety concerns, slower draw |
Finding the right position takes trial and error. Start with these six options and fine-tune your setup to match your lifestyle and comfort needs.
Concealed Carry Positions That Are Comfortable
1. Appendix Position (1 O'Clock)
The appendix carry position, located between your belly button and hip (around the 1–2 o'clock area), is a popular choice for right-handed carriers. This front-of-waist placement provides quick access and is known for being one of the fastest draw positions.
Skilled shooters can draw in under one second while maintaining accuracy. This speed comes from the natural alignment of your arms near the holster.
"It's a perfectly logical place to put a weapon, because our arms naturally hang in that region and it allows quick access to whatever object you're carrying at that position."
To improve comfort and efficiency when carrying in this position, focus on these key adjustments:
| Adjustment | Purpose | Benefit |
|---|---|---|
| Ride Height | Align grip for the draw | Quicker target acquisition |
| Cant Angle | Fit holster to your body | Better concealment |
| Belt Position | Move buckle away | Reduces bulk and pressure |
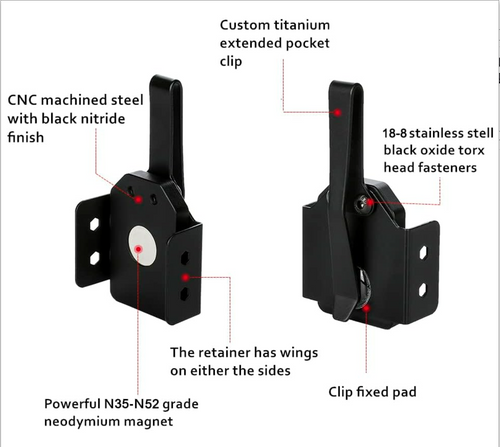
An adjustable holster with strong trigger protection is essential for safety and allows you to fine-tune the setup for your body type and preferences.
Body type plays a big role in how comfortable appendix carry feels. Those who bend at the waist often may need to adjust the holster to avoid pressure points from the grip or slide. Small changes in position - like shifting to 1:30 or 2:45 - can also make a difference.
For better concealment without sacrificing comfort, try these tips:
- Wear darker or patterned shirts to reduce printing.
- Choose looser clothing around the waistline.
- Adjust the holster to fit naturally with your body shape.
Another advantage of appendix carry is the ability to maintain visual contact with your weapon during the draw. This helps improve retention and reduces the risk of disarming attempts.
2. Hip Position (3-4 O'Clock)
Carrying your firearm between 3 and 4 o'clock inside the waistband (IWB) is a comfortable and practical option. For right-handed shooters, placing the holster on your strong side provides solid concealment and allows for a natural draw.
Here’s how to fine-tune your setup:
| Adjustment Factor | Impact on Carry | Recommendation |
|---|---|---|
| Ride Height | Affects how easily you can draw and move | Adjust so the holster clears your leg comfortably |
| Cant Angle | Affects concealment and draw movement | Try a slight forward tilt to see what feels best |
| Belt Position | Impacts holster stability | Secure the holster firmly on your strong side for better retention |
This position works well because your arm naturally aligns for a smooth draw. However, bending at the waist can sometimes reveal the firearm's outline (printing), especially with lighter clothing. Drawing while seated may also require additional adjustments. To perfect this setup:
- Begin by wearing the holster without the firearm to test comfort and fit.
- Pay attention to holster placement and choose clothing that enhances concealment.
For everyday carry, this position keeps your firearm easily accessible along your strong side. Right-handed shooters may prefer 3 o'clock for direct hip alignment, while moving to 4 o'clock can improve concealment. With the right adjustments and clothing, you can stay prepared and discreet throughout the day.
3. Mid-Back Position (4-5 O'Clock)
Carrying at the mid-back, between 4 and 5 o’clock, offers a balance of comfort and concealment for everyday use. This spot works naturally with your body’s curves, providing a secure way to conceal your firearm while keeping it accessible. Unlike front-carry, this position uses your back’s shape to help hide the firearm effectively.
This position takes advantage of your body’s natural contours to keep the firearm discreet. However, bending forward might reveal the outline, so be mindful of your movements.
| Aspect | Benefits | Considerations |
|---|---|---|
| Concealment | Works with natural body curves | May show when bending forward |
| Accessibility | Allows for a smooth draw motion | Can be slower to draw while seated |
| Comfort | Comfortable for all-day wear | |
| Clothing | Works with various clothing styles | Slightly loose garments are preferred |
"Wherever you choose to carry on your person, be sure you're aware of how that position affects your comfort as you're moving throughout the day and that your skill set is to the point you are making a clean draw on pure muscle memory and not consciously thinking about your draw." – StealthGearUSA
Tips for Using the Mid-Back Position
- Test Your Movement: Stand, sit, and walk to ensure the holster stays comfortable throughout the day.
- Watch for Printing: Be cautious when bending forward to avoid revealing the firearm's outline.
- Practice Your Draw: Work on drawing in different positions - standing, seated, or crouched - to build muscle memory.
This position works particularly well for those who are on their feet most of the day or need to maintain a polished, professional appearance.
sbb-itb-7fb5bb8
4. Side-Back Position (5 O'Clock)
The side-back position at 5 o'clock strikes a balance between keeping your firearm concealed and maintaining comfort. Like other inside-the-waistband (IWB) positions, it requires adjustments to ensure a smooth draw and ease of wear throughout the day.
| Aspect | Advantages | Challenges |
|---|---|---|
| Comfort | Takes advantage of natural body contours | Can be uncomfortable when sitting |
| Concealment | Excellent concealment due to body shape | – |
| Accessibility | Easy to access while standing | Slower draw compared to front positions |
| Training Needs | Basic draw practice is sufficient | Additional practice needed for seated draws |
This position works best when you consider how your daily movements and activities might affect access to your firearm. Firearms expert John Correia highlights the urgency of a quick draw in critical situations, stating, "In a situation where someone has drawn a gun on you, you only have about 0.6-2 seconds to draw your pistol and fire first depending on the circumstances". Regular training is key to mastering this carry method.
Important Safety Considerations
Ernie Medina, chief instructor and owner of TRB Training, raises concerns about the small-of-the-back carry:
"The aspect with the small of the back that I'm not too keen on is really having that firearm ... in a position where my arms can't really get to [it] without being in a position of vulnerability".
Neil Nemetz from Geauga Firearms Academy adds:
"If you are in a violent encounter, it's not going to be a scenario where you're going to be gently lowered to the ground; there's a good possibility you're going to get shoved down. So think about this, do you really want to get forced down to the ground with this piece of steel right in your spine? I certainly don't".
Practical Tips for Side-Back Carry
- Practice drawing from this position until it becomes second nature.
- Wear clothing that naturally covers the carry area without drawing attention.
- Adjust your holster placement to match your body shape for maximum comfort and ease of access.
For left-handed carriers, shifting to the 7–8 o'clock position provides similar concealment and accessibility. These tweaks ensure a safer and more effective side-back carry experience.
5. Cross Draw Setup (10-11 O'Clock)
The cross draw setup works well for those who spend a lot of time seated, like drivers. It positions the holster on your non-dominant side, with the grip angled toward your dominant hand for a smooth draw.
| Scenario | Benefits | Considerations |
|---|---|---|
| Vehicle Operations | Easy access while seated | Requires a cover garment |
| Extended Sitting | More comfortable for sitting | Needs additional training |
| Professional Drivers | Natural seated draw | Practice is essential |
| Mounted Activities | Unobstructed access | Requires deeper concealment |
Now, let’s dive into the comfort and accessibility of this setup.
Comfort and Accessibility
Cross draw is especially suited for those who spend long hours in vehicles or confined spaces. Vedder Holsters explains:
"Cross draw carry is a method in which a holster is worn on the 'weak side' of the body, and drawn across it with the dominant hand. Though not typically recommended for inexperienced shooters, cross draw is a popular carry position for those who spend a lot of time on the road".
Practical Applications and Concealment
This position is ideal for:
- Professional drivers
- Delivery workers
- Truckers
- Mounted patrol officers
- Individuals with limited mobility
Cross draw balances easy access with concealment. However, an outer garment is necessary for proper coverage. Using a holster with an adjustable cant can improve both comfort and draw efficiency. Regular practice is key to mastering this carry method and ensuring a smooth draw in real-world scenarios.
Training Requirements
To get the most out of cross draw, consistent training is essential. Focus on:
- Drawing while seated
- Maintaining safe muzzle direction
- Refining the cross-body motion
- Practicing with your chosen cover garment
Setup Optimization
To fine-tune your cross draw setup, consider these features:
- Adjustable cant for a tailored fit
- Tension adjustments for secure retention
- High-quality materials for durability
Achieving success with cross draw requires balancing comfort, accessibility, and concealment, all backed by regular, focused practice.
6. Center Back Position (6 O'Clock)
The center back position, also referred to as the small of the back (SOB), offers strong concealment but comes with its own set of challenges for everyday carry.
Concealment Benefits
The natural curve of your spine helps hide your firearm effectively. As one expert puts it:
"Because your back naturally curves at the spine, your firearm will virtually disappear under your shirt or jacket in this position".
This alignment helps reduce visible printing, making it harder for others to notice your weapon.
Comfort Considerations
This position tends to be comfortable when you're standing or walking. However, it becomes less practical when seated for extended periods.
Safety and Draw Considerations
Drawing from the center back can be tricky. Reaching around your spine slows down access, which could be critical in high-stress situations. Ernie Medina, chief instructor and owner of TRB Training, highlights this issue:
"The aspect with the small of the back that I'm not too keen on is really having that firearm ... in a position where my arms can't really get to [it] without being in a position of vulnerability".
Neil Nemetz from Geauga Firearms Academy raises another concern:
"If you are in a violent encounter, it's not going to be a scenario where you're going to be gently lowered to the ground; there's a good possibility you're going to get shoved down. So think about this, do you really want to get forced down to the ground with this piece of steel right in your spine? I certainly don't".
These risks make it clear that this carry method requires careful consideration and preparation.
Training Requirements
To safely and effectively use this position, focus on improving your draw technique and staying alert under pressure. USA Carry advises:
"Given the challenges of comfort, the draw, and the potential for injury, small of the back carry is really not the best manner in which to conceal a pistol".
Proper training can help mitigate some of these challenges, but this position may not be ideal for everyone.
Summary and Next Steps
Finding the right IWB holster position takes trial and error. It's all about figuring out what works best for your body and daily routine.
"Comfort is not a product that you can buy – it's a skill and a process".
Testing Your Carry Position
Start by trying out different setups to see how they fit with your body. Here's a simple guide to help:
| Testing Phase | Key Actions | What to Look For |
|---|---|---|
| Initial Setup | Try an unloaded firearm in multiple positions | How it fits your body; basic comfort |
| Movement Testing | Go through daily motions (sitting, walking) | Smooth movement; no joint issues |
| Fine-tuning | Adjust ride height and cant | Comfort and easy access |
| Extended Wear | Wear for longer periods | Check for pressure, friction, or sweat issues |
This step-by-step approach helps you refine your setup for better comfort and usability.
Addressing Common Issues
When adjusting your carry position, focus on how it aligns with your body before adding extra padding or accessories:
- Place the firearm in a spot that feels naturally supported by your body.
- Think about your usual clothing and how it works with your setup.
- Factor in the local climate to avoid discomfort from heat or moisture.
Once you've made these adjustments, practice regularly to build muscle memory and confidence.
Building Confidence
Getting comfortable with concealed carry takes patience and repetition. Testing and tweaking your setup is key to feeling secure and prepared.
"All bodies are different, and there's no shortcut for doing the self-assessment steps".
Pay attention to:
- Pressure points that might appear after wearing it for a while.
- Any friction that causes irritation.
- Balance issues that might limit natural movement.
- How well the setup handles moisture during activity.
For additional support, consider professional training. This can help you refine your technique and boost your confidence, making your concealed carry experience smoother and more effective.