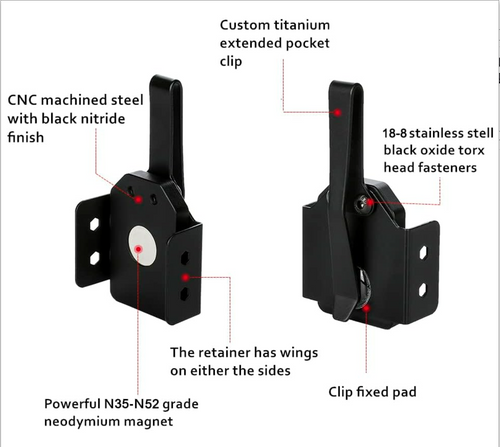
Breaking in your leather holster ensures a secure fit, smooth draw, and long-lasting performance. Here's how to do it safely and effectively:
-
Why Break It In?
- Improves firearm retention.
- Makes drawing faster and smoother.
- Extends the holster's lifespan.
-
What You Need:
- Plastic bags or wax paper.
- Leather conditioner.
- Denatured alcohol.
- Soft cloth and brush.
-
Key Steps:
- Wrap your unloaded firearm in plastic.
- Insert it into the holster overnight to stretch the leather.
- Test the fit and adjust as needed.
- Apply leather conditioner to maintain flexibility.
Safety Tip: Always unload your firearm and keep ammunition in a separate room.
Getting Started: Required Tools and Safety
Tools and Materials List
Before breaking in your leather holster, gather the following items:
-
Basic Materials:
- Clean plastic bags or wax paper
- Soft cleaning cloth
- Leather conditioner
- Small brush for applying conditioner
- Denatured alcohol
- A clean workspace with proper lighting
Stick to high-quality materials. For the plastic wrap method, kitchen-grade plastic bags or wax paper work well.
Once you have everything ready, make sure to follow these safety steps before starting.
Safety Checks and Precautions
Safety is key when working with a leather holster. Follow these steps to ensure a smooth and secure process:
1. Firearm Safety Protocol
Make sure your firearm is completely unloaded. Remove the magazine and clear the chamber.
2. Workspace Setup
Set up a dedicated workspace away from any ammunition. Use a clean, flat surface with proper lighting to work carefully and inspect the holster throughout the process.
3. Material Testing
Before applying any products, test the leather conditioner and alcohol on a small, hidden area of the holster. As Falco Holsters advises:
Use a little force with it, but not too much that it harms the leather itself
Apply alcohol sparingly, focusing on areas like the trigger guard and thumb strap, using a brush or cloth.
Key Safety Tips:
- Always unload your firearm first.
- Keep ammunition in a separate room.
- Ensure your workspace is well-lit.
- Inspect the holster frequently for wear or damage.
- Stop immediately if you notice any unusual changes in the leather.
Properly breaking in your holster not only improves comfort but also ensures it retains its safety features. Pay close attention to retention areas and test the holster's fit with an unloaded firearm before using it.
How To Break-In A Leather Holster l 3 [Proven] Methods
Basic Break-In: The Plastic Bag Technique
The plastic bag method is a simple way to break in your leather holster without causing damage. It helps stretch the leather gently while keeping both the holster and firearm in good condition.
How to Use the Plastic Bag Method
Here’s how to get started with this technique:
1. Gather Your Materials
Use a clean, large plastic bag - kitchen-grade bags work well. The plastic bag:
- Protects against any residue
- Reduces friction during the break-in process
2. Wrap Your Unloaded Firearm
Carefully wrap your unloaded firearm in the plastic bag. Make sure the bag is smooth and wrinkle-free, especially around areas like the trigger guard and slide.
3. Insert Into the Holster
Slowly insert the wrapped firearm into the leather holster. The extra bulk from the bag helps stretch the leather evenly while protecting the firearm’s finish.
Best Practices and Timing Tips
Stick to these guidelines for the best results:
Suggested Break-In Schedule:
- Leave the wrapped firearm in the holster overnight.
- Check the fit the next morning by removing the firearm and plastic.
- Repeat the process overnight if necessary.
Keep in mind, the goal is to stretch the leather slightly. Overdoing it can lead to a loose fit.
What to Watch For:
- Test the holster’s retention after each session.
- Look for even stretching across all contact points.
- Test the draw resistance using an unloaded firearm.
- Stop immediately if the holster feels excessively loose.
The aim is to ensure smooth insertion and removal of the firearm while maintaining proper retention. Once the leather has stretched to the desired fit, you can further condition it to improve its flexibility and durability.
sbb-itb-7fb5bb8
Leather Conditioning Steps
After stretching your holster using the plastic bag method, it's time to condition the leather to keep it flexible and long-lasting.
Choosing a Leather Conditioner
Pick an oil-based conditioner that repels water but isn't waterproof. Stay away from products with excessive wax, harsh chemicals, or watery sprays. Look for these qualities:
- Natural, oil-based formula
- Water-repellent properties
- Non-toxic ingredients
- Free from animal products
- No wax content
How to Apply Conditioner
Follow these steps to apply the conditioner evenly:
- Clean the holster with a lint-free cloth to remove dirt or dust.
- Test the conditioner on a hidden area to ensure compatibility.
- Using a small amount, apply it gently in circular motions. Pay extra attention to high-stress areas like retention points, belt loops, and stitching lines.
Always test new products on a small area first to avoid any potential damage.
Conditioning Schedule
Stick to the following schedule to maintain your leather holster:
| Phase | Frequency | Notes |
|---|---|---|
| Initial Break-in | Once after the plastic bag method | Allow 24 hours to dry |
| First Month | Every 2 weeks | Check how well the leather absorbs the conditioner |
| Maintenance | Every 3-4 months | Adjust based on wear and climate |
Leather naturally contains oils that need regular replenishment. Depending on how often you use the holster and the climate you’re in, you might need to tweak this schedule.
Final Adjustments and Testing
Once your holster is stretched and conditioned, it’s time to fine-tune its retention and ensure it performs as expected.
Setting Proper Retention
Adjust your holster so it securely holds your unloaded firearm while still allowing a smooth draw. Test the retention by gradually increasing movement intensity:
- Start with walking and jogging in place.
- Move on to jumping jacks and burpees.
- Try sprint intervals.
- Finish with hip bridging exercises.
For Inside-the-Waistband (IWB) holsters, retention depends on the holster’s design, the pressure from your body, and the tension of your belt.
Fixing Common Problems
If you encounter fit problems, here’s how to address them:
- Tight areas: Use the wet-fit method with a plastic bag to stretch the leather. Apply extra conditioner to problem spots, and use a dowel to form sight channels if needed.
- Loose retention: Mold the holster with plastic wrap to avoid overstretching. You can also expose the leather to slight moisture to encourage minimal shrinkage. Always check your belt tension to ensure proper fit.
Testing for Complete Break-In
You’ll know your holster is fully broken in when it meets these standards:
| Test Area | What to Look For |
|---|---|
| Draw Stroke | Smooth release without any binding |
| Retention | Secure hold during physical activity |
| Comfort | No sharp edges or uncomfortable pressure |
| Sight Path | Clear channel for sights |
| Leather | Even flexibility across the holster |
When your holster feels like it’s made just for you - with soft, flexible leather that still holds its shape - it’s ready for regular use. Always test in a controlled environment, focusing on proper technique and safety before incorporating it into your routine.
Conclusion: Maintaining Your Broken-In Holster
Once your leather holster is broken in, keeping it in good condition is essential to ensure it lasts. Wipe it down daily with a dry cloth, and every 3–4 months, give it a deep clean using warm water, glycerin soap, and a soft brush.
Here’s a simple guide to help you stay on track:
| Maintenance Task | Frequency | Method |
|---|---|---|
| Basic Cleaning | Daily | Wipe with a dry cloth |
| Deep Cleaning | Every 3–4 months | Use warm water and glycerin soap |
| Conditioning | Twice yearly | Apply an approved leather conditioner |
| Inspection | Monthly | Check for signs of wear or damage |
"Premium-grade leather should be stored and cared for properly to prevent it from becoming dry, brittle, or moldy." - Bianchi Leather
To avoid damaging your holster, steer clear of these common mistakes:
- Don’t submerge it in water.
- Avoid drying it with a hair dryer or any heat source.
- Keep it out of direct sunlight and extreme temperatures.
- Stay away from harsh chemicals or oils that could harm the leather.
For storage, wrap the holster in a soft cotton cloth and place it in a cool, dry spot. This helps protect the leather while allowing it to breathe. If it gets damp, let it air dry completely before using or storing it.
Conditioning is just as important as cleaning. Use leather conditioner sparingly to keep the material soft and maintain its shape. Products like Fiebings Aussie Conditioner and Bick 4 are great options. To reduce friction and guard against moisture, spray silicone on the interior.


